
GitHub Copilot
Copilotの説明やライセンス購入は、以下の記事をご覧ください。

IntelliJでGitHub Copilot用のプラグインをセッティングする
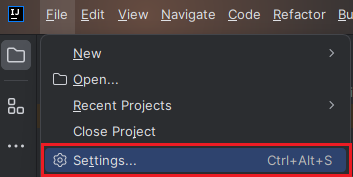
IntelliJのメニュー「File」の「Settings」を選択します。
「Plugins」
↓
「Marketplace」
↓
「copilot」 ※検索ワード
↓
「Install」を選択します。

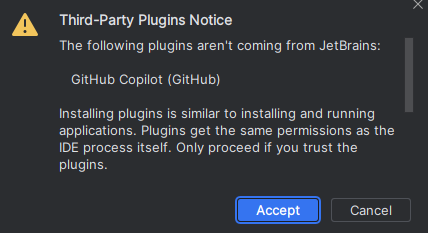
「Accept」を選択します。
「Restart IDE」を選択します。

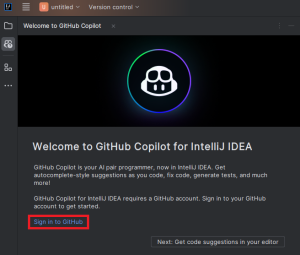
IntelliJを再起動するとCopilotのサイドメニューが表示され、GitHubへサインインするためのリンクが表示されているのでサインインします。
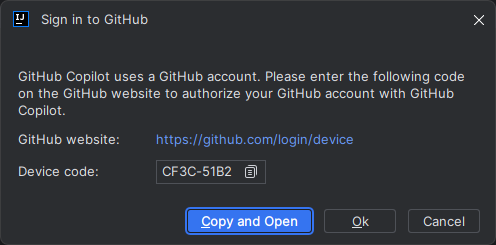
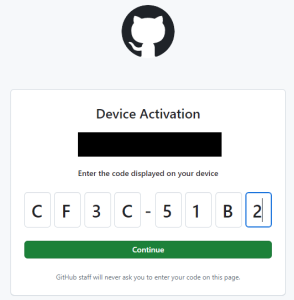
1.デバイスコードをクリップボードにコピーします。※このコードはワンタイムです。
2.次にGitHub websiteのリンクをクリックします。
先ほどのデバイスコードを貼り付けます。
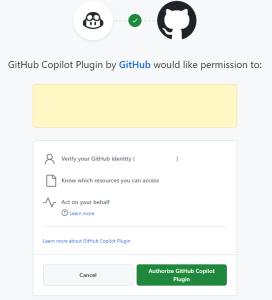
「Authoize」を選択します。
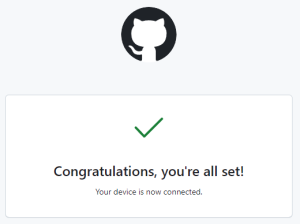
認証完了
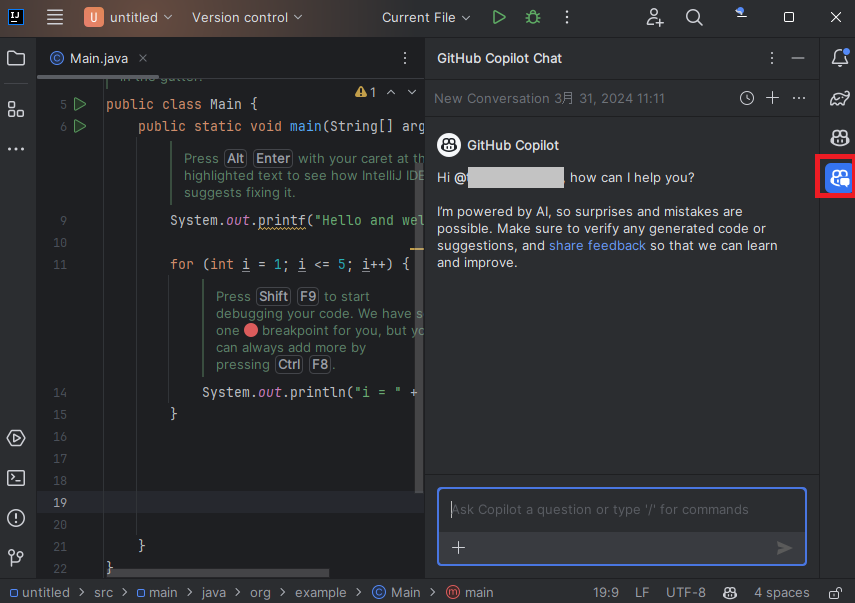
GitHub Copilot Chatを呼び出す
サイドバーのGitHub Copilot Chatアイコンをクリックすると表示されます。ここに実現したい事、質問などを入力すると選択肢などを返答してくれます。


コメント