TerraformでのEC2インスタンス作成
awsの各種インスタンスはAWSマネジメントコンソールを使用し手動で作成することもできますが、場合によっては2度3度と構築作業が必要になるケース(例えば、開発用・検証用・本番用)があり、手順を誤ると同じ構成で再構築できません。そこでインフラ構築を再現性100%で行うために「Terraform」を使用します。Terraformはローカルでコマンドを実行し、aws上に各種インスタンスを構築することができます。
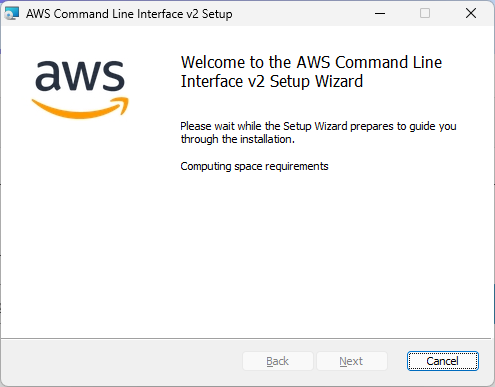
AWS CLIをインストール
Terraformコマンドを実行するために、まずはAWS CLIをインストールします。

AWS CLIのインストール状況を確認
インストール完了後、コマンドプロンプトで以下を実行し、正常にインストールされていることを確認します。
aws --version

aws-cli/2.24.10 Python/3.12.9 Windows/11 exe/AMD64
AWS CLIの認証情報を設定①(プロファイル)
以下のコマンドを実行し、アクセスキーなどを入力して設定します。設定した情報は「%USERPROFILE%\.aws」フォルダ配下に保存されます。プロファイル名の指定は必須ではありませんが、複数環境に接続する場合、プロファイル指定しておいたほうが良いです。
aws configure --profile プロファイル名

AWS Access Key ID [None]: xxx
AWS Secret Access Key [None]: xxx
Default region name [None]: xxx
Default output format [None]:
AWS CLIの認証情報を設定②(MFA認証も設定している場合)
MFA認証も利用している場合、aws_session_tokenの設定が必要です。コマンドで設定ができないため、「%USERPROFILE%\.aws\credentials」をエディタで直接開き編集します。
AWS CLIの認証情報を確認
aws configure list --profile プロファイル名

      Name                    Value             Type    Location
      ----                    -----             ----    --------
   profile        xxx                         manual    --profile
access_key     ****************XXXX shared-credentials-file
secret_key     ****************XXXX shared-credentials-file
    region           ap-northeast-1      config-file    ~/.aws/config
認証が通ることを確認する
aws sts get-caller-identity --profile my-profile

{
    "UserId": "xxx",
    "Account": "xxx",
    "Arn": "arn:aws:sts::xxx"
}
認証が失敗した場合、次のようなメッセージが表示されます。
An error occurred (InvalidClientTokenId) when calling the GetCallerIdentity operation: The security token included in the request is invalid.
Terraformをインストール
公式サイトからダウンロードしローカルで解凍します。インストーラは無く、解凍したファイルをお好みの場所に配置します。

環境変数は設定しても、設定しなくてもどちらでも構いません。環境変数を設定する場合、「Path」にTerraformを配置したフォルダを追加します。PC再起動で設定が反映されます。環境変数を設定しない場合、terraform.exeを配置してあるフォルダに移動し、以下コマンドでバージョンを確認できます。
terraform --version

Terraform v1.10.5
on windows_amd64
Terraform用の設定ファイルを作成
「xxx.tf」(HCL形式)というファイル名でお好きな場所に保存します。
# デフォルトのAWSプロバイダー設定
provider "aws" {
  region  = "ap-northeast-1"    # 東京リージョンを指定
  profile = "xxx"               # 使用するAWSプロファイルを指定
}

# Amazon Linux3のAMIベースにt2.microのEC2を作成
resource "aws_instance" "xxx-server" {
  ami           = "ami-0dfa284c9d7b2adad" # Amazon Linux3
  instance_type = "t2.micro"


  tags = {
    Name = "xxx-Instance"
  }
}
Terraform 初期化
initコマンドを実行することで、カレントフォルダに.terraformディレクトリと.terraform.lock.hclファイルが作成されます。
terraform init

Initializing the backend...
Initializing provider plugins...
- Finding latest version of hashicorp/aws...
- Installing hashicorp/aws v5.88.0...
- Installed hashicorp/aws v5.88.0 (signed by HashiCorp)
Terraform has created a lock file .terraform.lock.hcl to record the provider
selections it made above. Include this file in your version control repository
so that Terraform can guarantee to make the same selections by default when
you run "terraform init" in the future.

Terraform has been successfully initialized!

You may now begin working with Terraform. Try running "terraform plan" to see
any changes that are required for your infrastructure. All Terraform commands
should now work.

If you ever set or change modules or backend configuration for Terraform,
rerun this command to reinitialize your working directory. If you forget, other
commands will detect it and remind you to do so if necessary.
Terraform 実行プランの確認
作成しようとしている内容に誤りがないか確認します。このコマンドではまだEC2は作成されません。
terraform plan

Terraform used the selected providers to generate the following execution plan. Resource actions are indicated with the
following symbols:
  + create

Terraform will perform the following actions:

  # aws_instance.xxx will be created
  + resource "aws_instance" "xxx-server" {
      + ami                                  = "ami-0dfa284c9d7b2adad"
      + arn                                  = (known after apply)
・・・
Terraform 実行プランの適用
「Enter a value:」(実行しますか)と確認されるので「yes」を入力。進捗状況が表示され(この時は13秒でEC2作成完了)、EC2インスタンスが作成されます。
terraform apply

Enter a value:yes

aws_instance.xxx: Creating...
aws_instance.xxx: Still creating... [10s elapsed]
aws_instance.xxx: Creation complete after 13s [id=i-0ead3a372401960ed]

Apply complete! Resources: 1 added, 0 changed, 0 destroyed.
コメント